No Interest if Paid in Full in 6 Months
Rates range from 17.99% – 24.99% APR.
Promotional period — interest waived if you pay the full balance within 6 months of approval.
Plan 2601
Apply Now →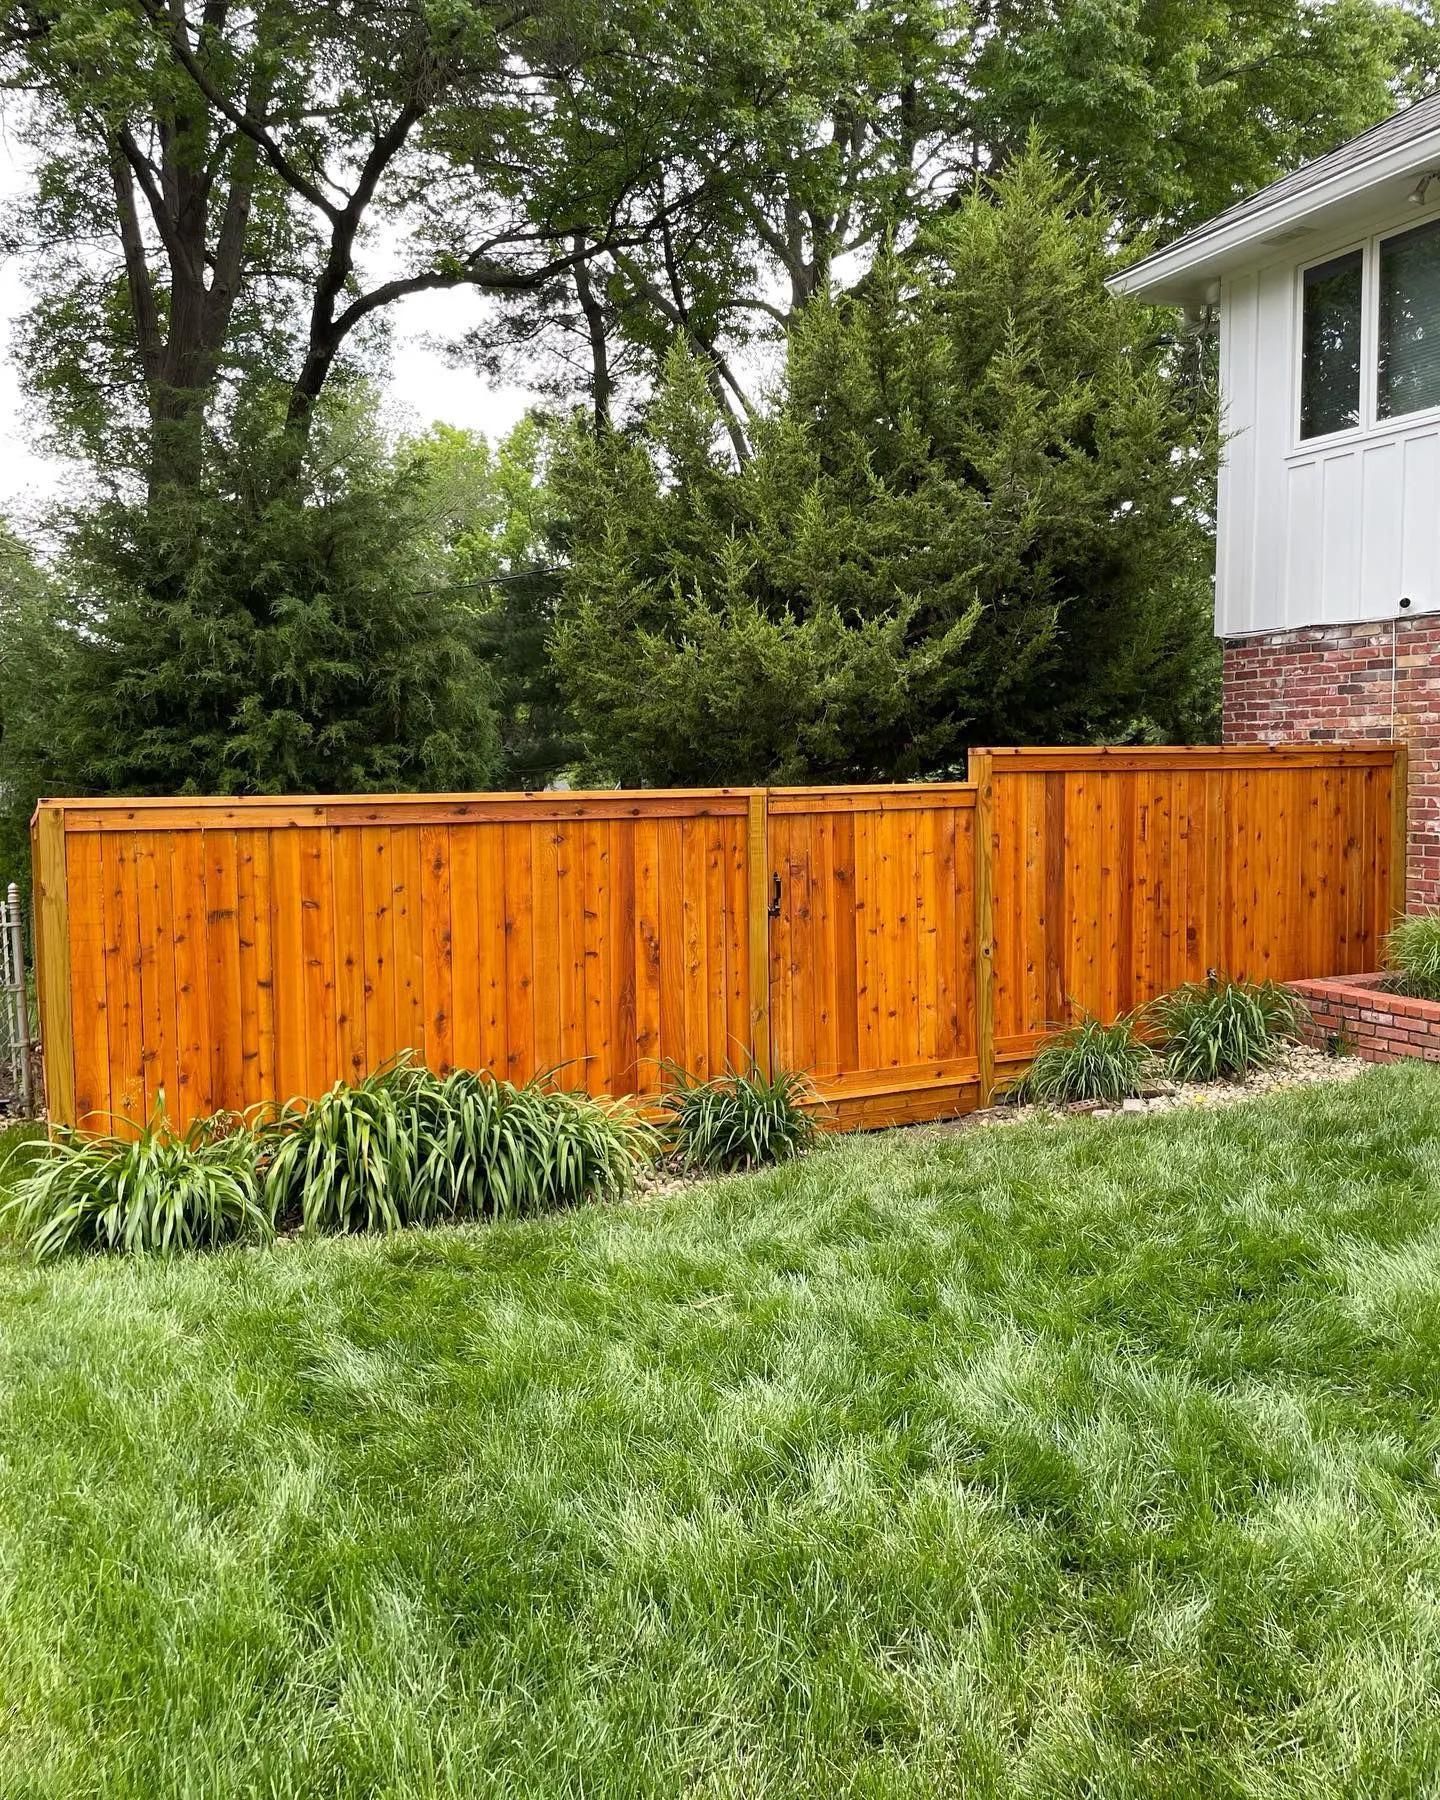
RESOURCES · KC FENCE GUIDES
KC's 80+ freeze-thaw cycles and summer UV load demand a specific staining approach. Here's the schedule that keeps cedar looking right and lasting 20+ years.
A cedar fence in Kansas City that isn't stained on schedule doesn't last 15 years — it lasts 8. The math is simple: KC's 80+ annual freeze-thaw cycles force moisture into unprotected wood grain, and the region's summer UV load breaks down unprotected surface fibers. A properly applied semi-transparent penetrating stain closes the wood grain against moisture, blocks UV, and adds years to the fence's structural life. Staining is maintenance, not cosmetics.
This guide covers the timing, products, and application method for KC cedar fences specifically — including what's different for pressure-treated pine, what happens when a cycle gets skipped, and when a professional application outperforms DIY.
Kansas City logs more than 80 freeze-thaw cycles per year — days where the temperature crosses 32°F in both directions. Each cycle pushes moisture into unprotected wood and then freezes it, expanding and contracting the grain. Over three to four seasons without a stain coat, this cycle physically opens the wood's surface, accelerating rot from the inside out.
KC's summer adds the second stress: 40–50 days per year above 95°F, with UV levels that bleach and oxidize unprotected cedar surfaces faster than most other parts of the country. Gray oxidized cedar signals real damage — the surface fibers have been broken down and the wood is now more vulnerable to moisture penetration.
A semi-transparent penetrating stain applied correctly addresses both: it closes the wood grain against moisture, adds UV stabilizers that resist oxidation, and preserves the natural color. In KC's specific climate, two to three years between coats is the practical window. Beyond three years, you'll notice visible graying and water no longer beads on the surface — both signs the stain has exhausted its protective window.
The timing of the first stain coat depends on the wood species — and getting it wrong is one of the most common mistakes on new fence installs.
Western Red Cedar
First coat at 30 days post-install.
Cedar dries fast. By day 30 under normal KC conditions, the moisture content has dropped to the level where stain can penetrate and bond. Don't wait longer — the UV window starts immediately, and cedar that sits unstained for 60–90 days post-install will start to gray at the surface. Once graying begins, a light sanding is required before the first coat can bond properly.
Pressure-Treated Pine
First coat at 90 days post-install.
Pressure-treated pine is saturated with preservative chemicals during manufacturing. Those chemicals need to fully cure out of the wood before a stain coat can bond. Staining PT pine before 90 days produces peeling within a season — the stain sits on top of the chemical residue rather than penetrating the wood. In KC's humid summer, the wait often stretches to 120 days for installs done in wet weather.
RKC puts the stain schedule in writing.
Every wood fence install from RKC includes a written stain schedule on the invoice: the earliest first-coat date, the recommended re-stain window, and the products we typically specify for KC HOA color requirements. You don't have to guess — the schedule is part of the project handoff.
Once the first coat is applied, the standard re-stain window for KC cedar fences is every 2 years for south and west-facing fence runs, and every 3 years for east and north-facing runs in shadier lots. The difference is UV exposure — direct afternoon sun degrades stain coatings roughly 30–40% faster than shaded north-facing runs.
The practical test: pour a cup of water on the fence boards. If water beads up and runs off, the stain is still active. If water soaks in within 30 seconds and darkens the wood, the stain's protective window is closing. Schedule the next coat within the next 60 days rather than waiting for the calendar.
In KC specifically, the spring season just after the worst of the freeze-thaw cycle is ideal timing for re-staining — late April through early June, after the last hard frost and before peak summer UV. This ensures the stain cures fully before the hottest months.
What happens when you skip a cycle.
A single skipped 2–3 year cycle rarely kills a cedar fence — but it opens the wood to accelerated moisture damage. Two consecutive skipped cycles often mean the wood surface needs sanding before re-staining can be effective. Three or more skipped cycles on a fence exposed to KC's west wind frequently results in post rot and board failure requiring repair or section replacement rather than just a stain job.
You don't need to guess about timing. These are the observable signs that a stain coat is due.
For most KC cedar fences, a semi-transparent penetrating stain is the correct specification — not a solid stain, not paint, and not a film-forming finish.
Semi-transparent penetrating stain soaks into the wood grain rather than forming a surface film. It enhances the natural wood color while providing UV and moisture protection. When it wears out, it simply fades — it doesn't peel. The next application goes directly onto the cleaned surface without stripping. This is the correct product for cedar privacy fencing.
Solid stain forms a surface film. It hides grain (opaque), provides excellent color saturation, and gives longer protection between coats (4–5 years). The downside: when it fails, it peels. Re-application requires stripping the old coat. Most KC HOAs that specify "natural" or "earth-tone" finishes are incompatible with solid stain because solid stain visually resembles paint.
Products that work in KC's climate: TWP (Total Wood Preservative), Ready Seal, Armstrong Clark, and Defy are the brands we most commonly specify. Each is a semi-transparent oil-based penetrating formula with UV inhibitors. Water-based stains can work but require more frequent re-application in KC's climate. We match the stain color to your HOA's approved list when required — most major brands produce colors that match standard HOA-approved natural and earth-tone finishes.
The single biggest quality differentiator between professional and DIY staining is technique — specifically, whether the stain is worked into the grain with a brush or just sprayed on and left.
RKC's standard method for fence staining: spray the stain at consistent coverage on one section, then immediately back-brush — work the wet stain into the wood grain with a brush while it's still wet. This forces the penetrating formula into the wood fibers rather than letting it sit on the surface. The result is deeper penetration, more even coverage, and longer protection between coats.
Spray-only application produces acceptable results on smooth, well-prepared cedar but misses the penetration depth that extends the protection window. Brush-only application is effective but time-consuming on large fence runs. Spray-and-back-brush is the method that produces consistent professional results at scale.
Surface prep matters as much as application method. Before any stain coat, the fence surface needs to be clean and dry. A light pressure wash (800–1,200 PSI on cedar — not too aggressive) removes dust, pollen, mold, and the chalky residue of expired stain. A wood brightener or oxalic acid wash restores the natural pH of weathered cedar and improves stain adhesion. The fence then needs 48–72 hours of dry weather before stain application.
DIY fence staining is worth doing if you can commit to the prep work, the timing, and the technique. The product cost for a 150-LF fence runs $200–$400 depending on product and coverage rate. The labor is a full day for one person — two if you're doing it right with prep, application, and cleanup.
Where DIY works well: a fence with straightforward board-on-board construction, no HOA color approval needed, good access on both sides, and an owner who can commit to a Thursday-Friday or weekend window with 48+ hours of dry weather.
Where professional application is the better call: HOA color submissions where shade-matching is required. Complex fence runs with gates, curves, or difficult access. A fence that hasn't been stained in 4+ years and needs prep work before staining. Any homeowner who won't realistically repeat the job in 2–3 years — because skipped cycles are more expensive than professional application.
RKC stains fences across the KC metro — we use the same crew that installed the fence, which means no strangers on the property and consistent color application. The same spray-and-back-brush method we use on new installs applies to re-stain jobs. See our fence staining and sealing service for what a professional application includes.
Professional fence staining in KC runs $1.50–$3.50 per linear foot for a standard 6-foot privacy fence, depending on fence condition, access, and whether prep work is needed.
For a 150-LF fence in good condition on the standard 2–3 year cycle, a professional re-stain runs roughly $250–$415 per cycle. Over 20 years, that's 7–10 cycles — a total maintenance cost of $1,750–$4,150 for a fence that should last 20–25 years with proper care. Without staining, the same fence may need major repair or full replacement at year 8–10.
RKC's in-house staining crew serves the KC metro — the same people who installed your fence, matched to your HOA's approved colors, spray-and-back-brush application.
Ready when you are